In this article, we will discuss how to clear your Gmail cache on your computer or mobile device. We will also provide some helpful tips on how to improve the performance of your Gmail account.
If you’re having trouble with Gmail, there’s a chance that the problem is related to your browser’s cache. A cache is a place where your browser stores some of the information it uses when browsing online. If you have too much data in this temporary storage area, it can slow down your computer and even cause problems with certain sites—including Gmail!
You may be wondering why you should clear the cache on your Gmail account. The simple answer is that clearing the cache can help to reduce load times and increase overall performance when using Gmail. When using a web browser, clearing your cache can also reduce bandwidth usage and speed up page loading times.
How to Clear Gmail Cache Using Chrome
If you’re having trouble with Gmail, clearing your cache might be the solution. Here’s how to do it in different ways:
Clear Gmail Cache Using Gmail “Offline” Method
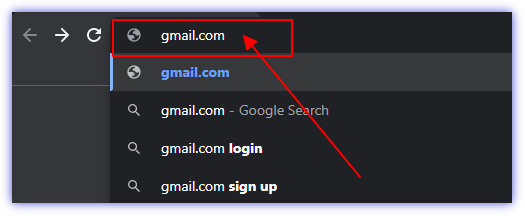
Step 1: Open Gmail
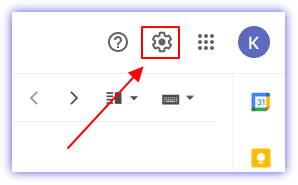
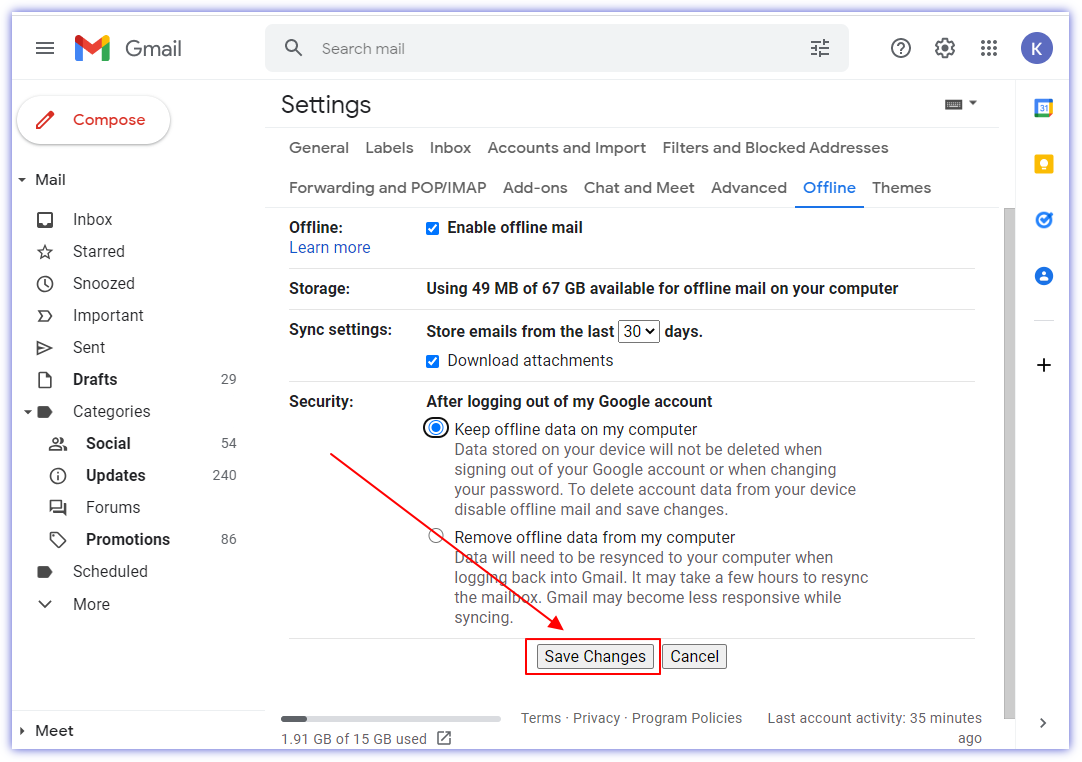
Step 2: Select Settings icon
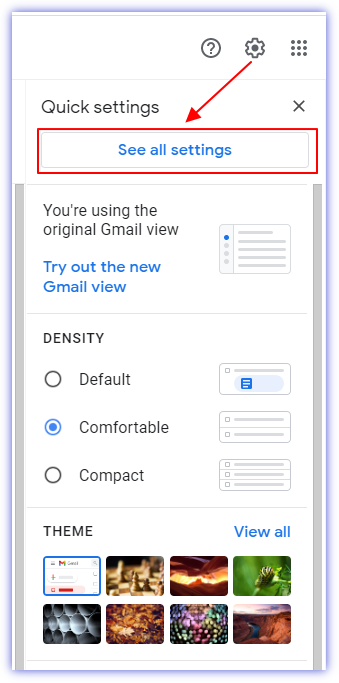
Step 3: Click ” See all settings“
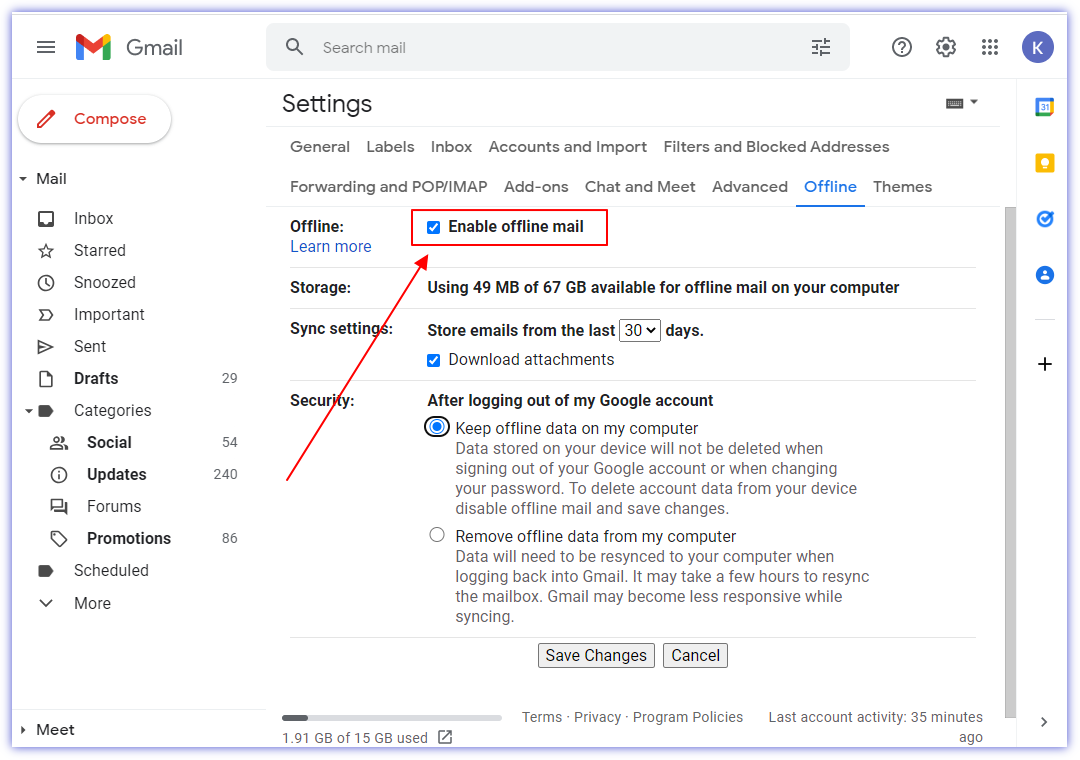
Step 4: Select ” Offline“

Step 5: Select “Enable Offline Mail” and make sure the box is checked.
Step 6: Next, click on “Save Changes “at the bottom of the screen to save the changes
Step 7: Close the Chrome browser.
Step 8: Above actions will automatically clear your cached email
Step 9: Once you’ve cleared your e-mail browser cache and history, you’ll need to re-enable offline mail to get Gmail to create new cached files.
Clear Gmail Cache Using “Clear browsing data” Method
Be sure to follow the steps below to ensure that all of your cached emails have been deleted.
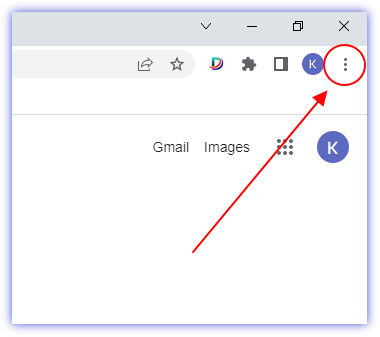
Step 1: In Chrome browser, click on the three-dot icon
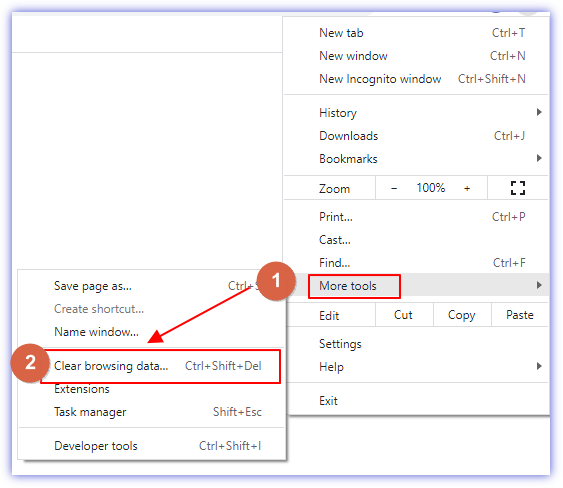
Step 2: Select “More Tools”
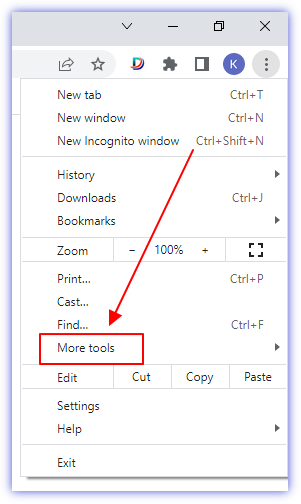
Step 3: Click on “Clear browsing data“
Step 4: Select “All time” from the “Time range” dropdown box.
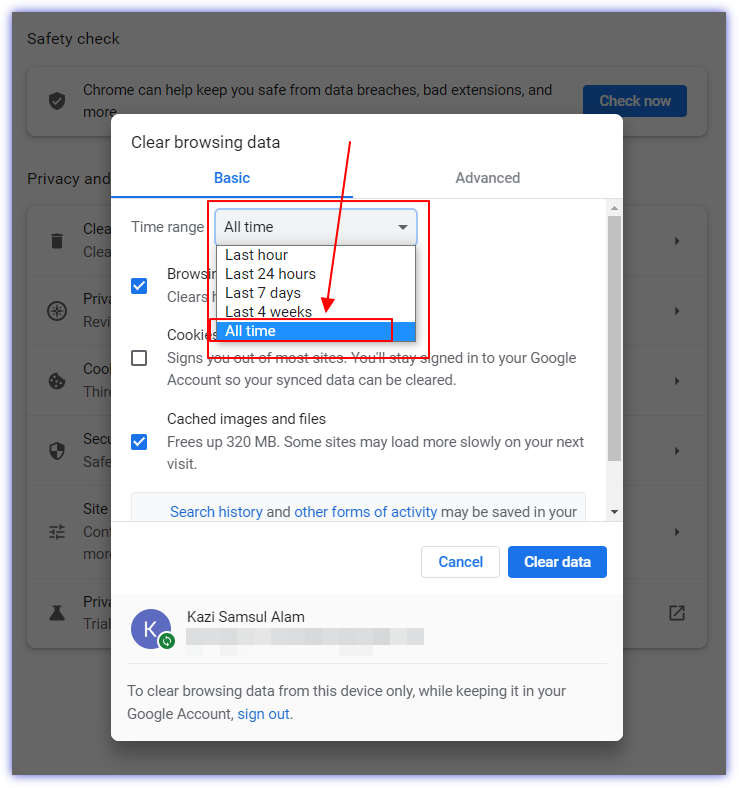
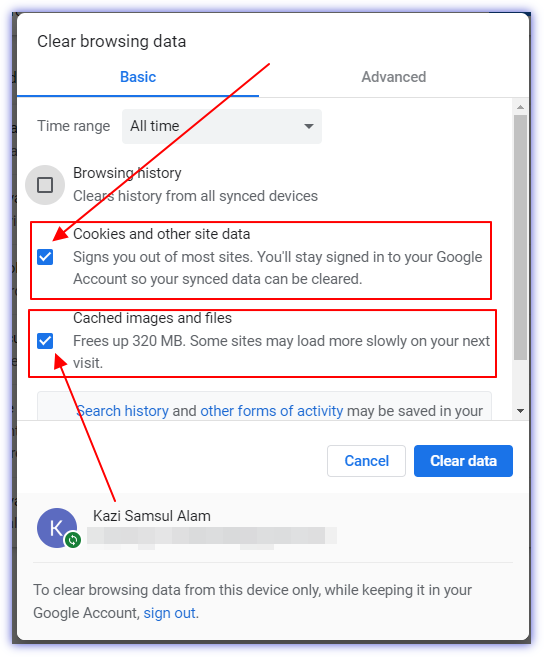
Step 5: Make sure you have checked “Cookies and other site data” and “Cached images and files”
Clearing your cache and cookies will remove site data from your browser, leaving only your history.
- Clear cache and cookies
- Delete history
- Delete cookies
- Delete local data
- Delete all site data (including cached images, stored passwords, etc.)
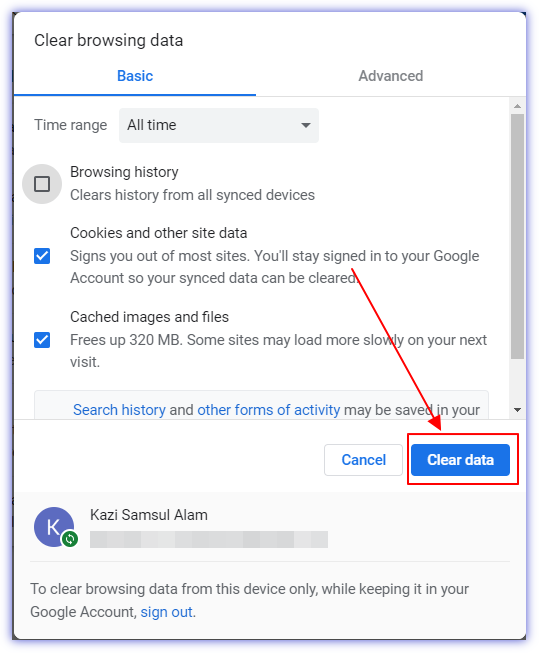
Step 6: Click on “Clear data”
Conclusion
Clearing your e-mail browser cache and history is a simple way to remove unnecessary data from your computer. If you’re using Google Chrome or Mozilla Firefox as your Internet browser, you can quickly clear the cache with just a few clicks. Clearing your cache and cookies will remove site data from your browser, leaving only your history. Once you’ve cleared your e-mail browser cache and history, you’ll need to re-enable offline mail to get Gmail to create new cached files. If you don’t want this kind of caching in the first place, though, you may want to disable it by going back into settings and undoing whatever changes you made above.
Hi, everyone! Thanks for reading.
If you found this helpful, please share it with your friends and family. And if you have any questions about how to clear Gmail cache, please leave them in the comments section below. We’ll get back to you as soon as possible!
FAQs
What Is a Cache?
A cache is a temporary storage location where data can be stored temporarily. In the case of Gmail, it’s used to store all of the emails that you’ve downloaded from your email account and saved on your computer. It also stores images or other files that have been embedded into your emails by sending or receiving parties. These files are stored on both your computer and the Gmail servers for quick retrieval when needed again in the future.
Why You Should Clear Gmail Cache?
If you’ve ever opened up an old email only to find that it has been corrupted or doesn’t load properly, it’s likely because there were too many emails saved in your cache. This can happen if you’ve been using Gmail for years and haven’t cleared out old messages regularly enough before they start affecting performance negatively overall (e.g., making new emails load slowly).


