
If you’ve ever wondered how to CC in Gmail, and how to BCC in Gmail, this article will show you how!
CC, BCC, and To are three ways to add email addresses to an email message. The CC (carbon copy) and BCC (blind carbon copy) fields allow you to send a message to one or more people without letting others see that they’ve been copied on it. This is useful for sending information that others don’t need access to or for sending personal messages from a business account without revealing the sender’s identity. You can also use the TO field in Gmail to send messages directly to specific recipients within your organization or group of friends.
What Are CC and BCC in Gmail?
CC and BCC are two of the most commonly used email functions, but they can be confusing. To keep it simple, if you’re sending an email to let someone know about something and you want them to be able to see that message in their inbox, you’d use Cc. If you want them to receive your message but don’t necessarily want all of the other recipients of your message to know who else received it, then use BCC.
What is CC in Gmail?
CC stands for “carbon copy,” and it’s one of the most powerful tools in Gmail. It allows you to send a copy of an email to someone without making them a part of the conversation. You can use this to keep your team up to date on projects without clogging up their inboxes, or you can use it to delegate tasks without getting involved in the details.
What is BCC in Gmail?
When you’re sending an email, you might be tempted to just hit “send” and go on with your life. But there are plenty of reasons why you should take a few extra seconds to add a blind carbon copy (or “BCC”) to your message.
For starters, it’s a great way to protect the privacy of other people who receive your emails. By including them as BCC recipients, they don’t have to worry about other people seeing their email addresses or names in the “to” field—and they also don’t have to worry about accidentally responding directly to someone they didn’t intend to reach out to.
It can also be useful if you need to keep track of who’s seen what content and when. If you’re using BCCs to keep track of which people have seen certain attachments or links, for example, then you’ll know exactly what emails have been opened by whom without needing access to any personal accounts whatsoever.
Finally, BCC can be used as a way to prevent spam filters from catching important messages that would otherwise get lost in the shuffle because some people receive too many emails per day for them all
How Do I Add an Email Address to a Gmail Message?
To add an email address to the “To” field of a Gmail message, click on that field. Type an email address and press “Enter.”
If you want to send your message to multiple people, separate addresses with commas. For example jane@gmail.com, john@gmail.com, sally@yahoo.com
How To CC in Gmail on Desktop (Windows or Mac)?
Steps are the following How to CC in Gmail:
Step 1: Go to Gmail and log in to your Account Open the email you want to send.
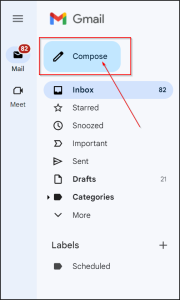
Step 2: Click on the Compose button, which is located in the top right corner of your screen.
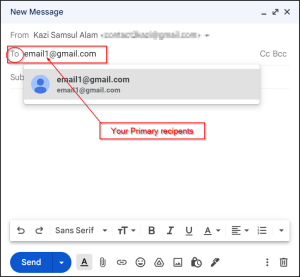
Step 3: In the To field, type the email addresses of primary recipients. You can enter multiple email addresses separated by a comma, space, or by pressing enter.
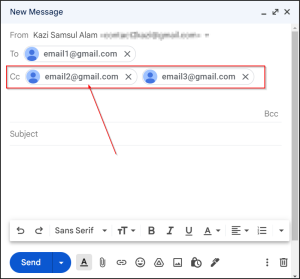
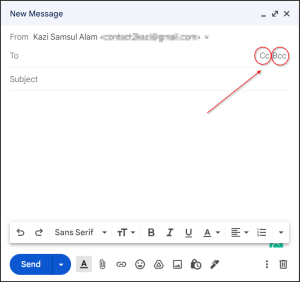
Step 4: Click on CC.
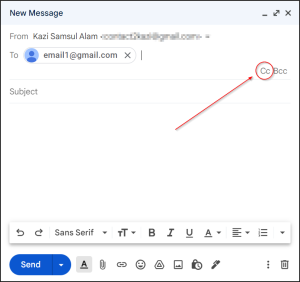
Step 5: Add your CC recipients. You can enter multiple email addresses separated by a comma, space, or by pressing enter.
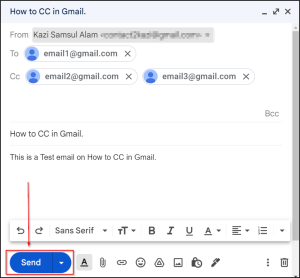
Step 6: Write your Subject Line and Body of the email.

Step 7: Click on Send. That’s it! Now you can send off your message knowing that it has been delivered to everyone who needs to receive it!
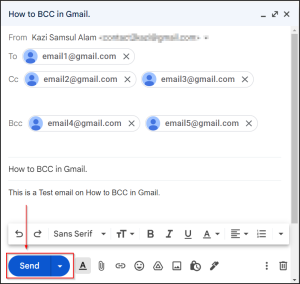
How To BCC in Gmail?
Here’s how to BCC in Gmail:
Step 1: Open Gmail.
Step 2: Follow the Step 2,3,4,5,6 described in the Section “How To CC in Gmail on Desktop (Windows or Mac)?”
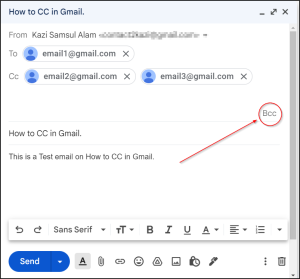
Step 3: To BCC in Gmail, click on the BCC field.
Step 4: Enter the email addresses of the recipients you’d like to blind copy or Bcc (e.g., “email4@gmail.com, email5@gmail.com”).
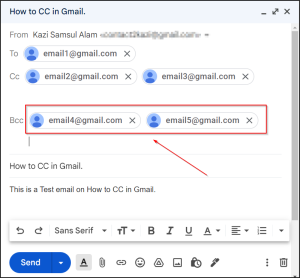
Step 5: Click on Send.
Here’s how to add addresses to your email message.
Here’s how to add addresses to your email message.
- Go to the compose email page.
- Click on the CC or BCC button, which is in the bottom right corner of Gmail’s window.
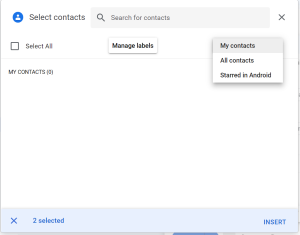
- A new window will open which shows your contacts list and any other email accounts you have connected through Google. To add an address, simply click on it in this list and then click add address when prompted by a pop-up box that appears at the bottom of your screen (it will say something like “adding 1 new recipient”).
- The person or people you’ve added will now appear in your CC field when writing an email! You can also remove them from here by clicking on their names again and selecting remove from the CC list.
- When finished writing your message, click send!
Conclusion
And that’s all there is to it! Now you know how to CC in Gmail, And how to BCC in Gmail whether you want the recipient to see who else has been sent the message or prefer not to show their name. If you have any questions or concerns, feel free to leave them in the comments below! And if you liked this article, please share it with your friends and family on Facebook, Twitter or wherever else you can think of!
FAQs
Why We Do CC in Gmail?
You’re probably asking yourself, “Why do we have to CC in Gmail?”
The answer is simple:
When you look at your email inbox, it’s not just a list of emails. It’s a list of tasks. When you see an email from your boss or client, what you really see is an opportunity to get something done. You don’t want to get distracted by the small stuff; you want to focus on the big picture and make sure that whatever needs doing gets done.
For some people, it’s a matter of habit; for others, a necessity. But all of us have been there: you’re emailing your boss about that project you’ve been working on and you hit “send” without realizing that you CCed your coworker who was supposed to be on the same page as you. Oops!
The good news is that there are ways to avoid these embarrassing (and potentially damaging) situations from happening again. And one of our favorite methods is using the CC feature in Gmail.
That’s why we do CC in Gmail—so we can focus on what matters most.
Why We Do BCC in Gmail?
We all know how important it is to keep your emails professional and friendly. But, when you send a lot of emails every day, it can be hard to remember who you CC’d and who you BCC’d.
When you CC someone in an email, they get a copy of the message that was sent out. This means that anyone who is on the CC list will see what other people are saying in the email. If you want to keep something private, you should use BCC instead of CC.
The main reason why we do BCC in Gmail is so we don’t have to worry about sending personal emails to the wrong person by accident. When we use BCC instead of CC, it helps us avoid sending sensitive information through email because only one person will receive it!
How to CC in Gmail ( Multiple emails )
If you need to send an email to multiple people, you can use the Cc field to send a copy of your message to anyone who might need it. You can also BCC people if you don’t want them to be able to see the other recipients on the To: line.
To CC someone in Gmail, click or tap Compose (or hit Ctrl+N on Windows or Command+N on Mac) and type in their email address under To:, then click or tap Cc:. You can add as many addresses as you want here!
When you’re ready, click Send at the bottom of your message.


